

I have photographed London for years, and it remains central to the way I work. What interests me is the speed at which its visual language changes. Within a relatively short walk you can move from Wren and Portland stone to post-war concrete, reflective glass and highly controlled contemporary public space. That variety makes London especially useful for learning, because the same compositional approach does not work everywhere.
I tend to photograph architecture as geometry, mass, rhythm, colour and light rather than simply as a record of a building. That is also how I teach it. Instead of starting with a list of famous locations, it is more useful to begin by asking what you want to practise.
Start with the question, not the building
A common mistake is to arrive at a landmark, stand where everybody else stands and then try to make the location produce a photograph. Reverse that process. Decide what you want to explore, then choose a place that gives you the right raw material.
- Lines and symmetry: look for repetition, strong axes and clear vanishing points.
- Layering and depth: work where different buildings, eras or planes overlap.
- Light and shadow: choose surfaces that change noticeably as directional light moves across them.
- Abstraction: use distance and longer focal lengths to isolate a fragment until the building becomes shape, colour or pattern.
- Scale: decide whether people should be removed from the frame or deliberately used to reveal the size of the architecture.
Those questions make the locations below much more useful than simply treating them as a checklist.
The City of London: old against new
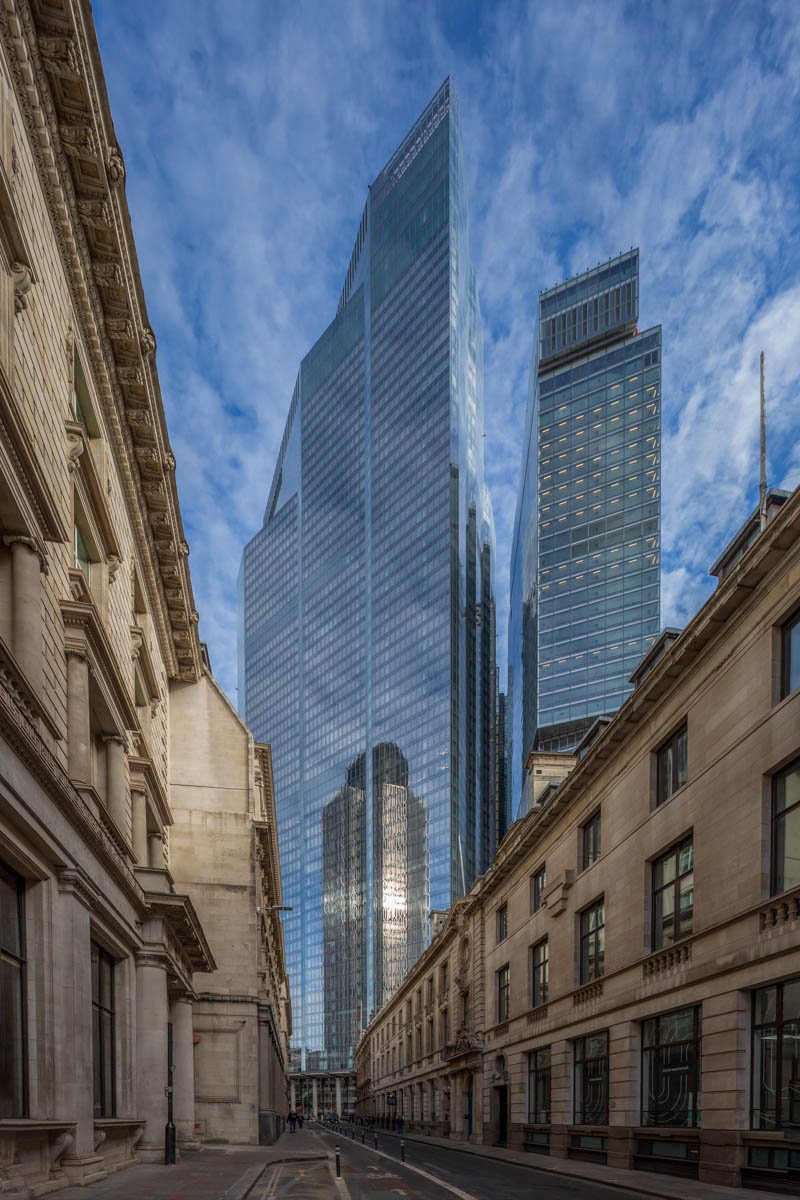
The City is one of the best areas in London for learning how to build depth into an architectural photograph. Around St Paul’s, Leadenhall Street and the surrounding lanes, historic stone, steel and glass repeatedly occupy the same field of view. The result can easily become chaotic, but that is exactly why the area is useful.
What to practise: look for one dominant relationship rather than trying to include everything. A historic façade can become a frame for a modern tower. A reflection can introduce a second building without physically showing it. A narrow gap may be more useful than the full elevation.
Light: early morning is often productive because the streets are quieter and strong differences develop between brighter upper storeys and darker lanes. Midday can also work if you deliberately use hard light and shadow rather than fighting it.
Lens choice: a standard zoom is usually enough. A wider lens helps in confined streets, but watch what it does to the verticals and to objects at the edges of the frame.
Access note: the City is a mixture of public highway and privately managed spaces. For a simple handheld personal shoot this is rarely complicated, but organised, commercial or equipment-heavy photography may require permission. If you are planning a tripod-based or formal shoot, check the current City of London photography and filming guidance before you go.
The Barbican: concrete, repetition and visual discipline
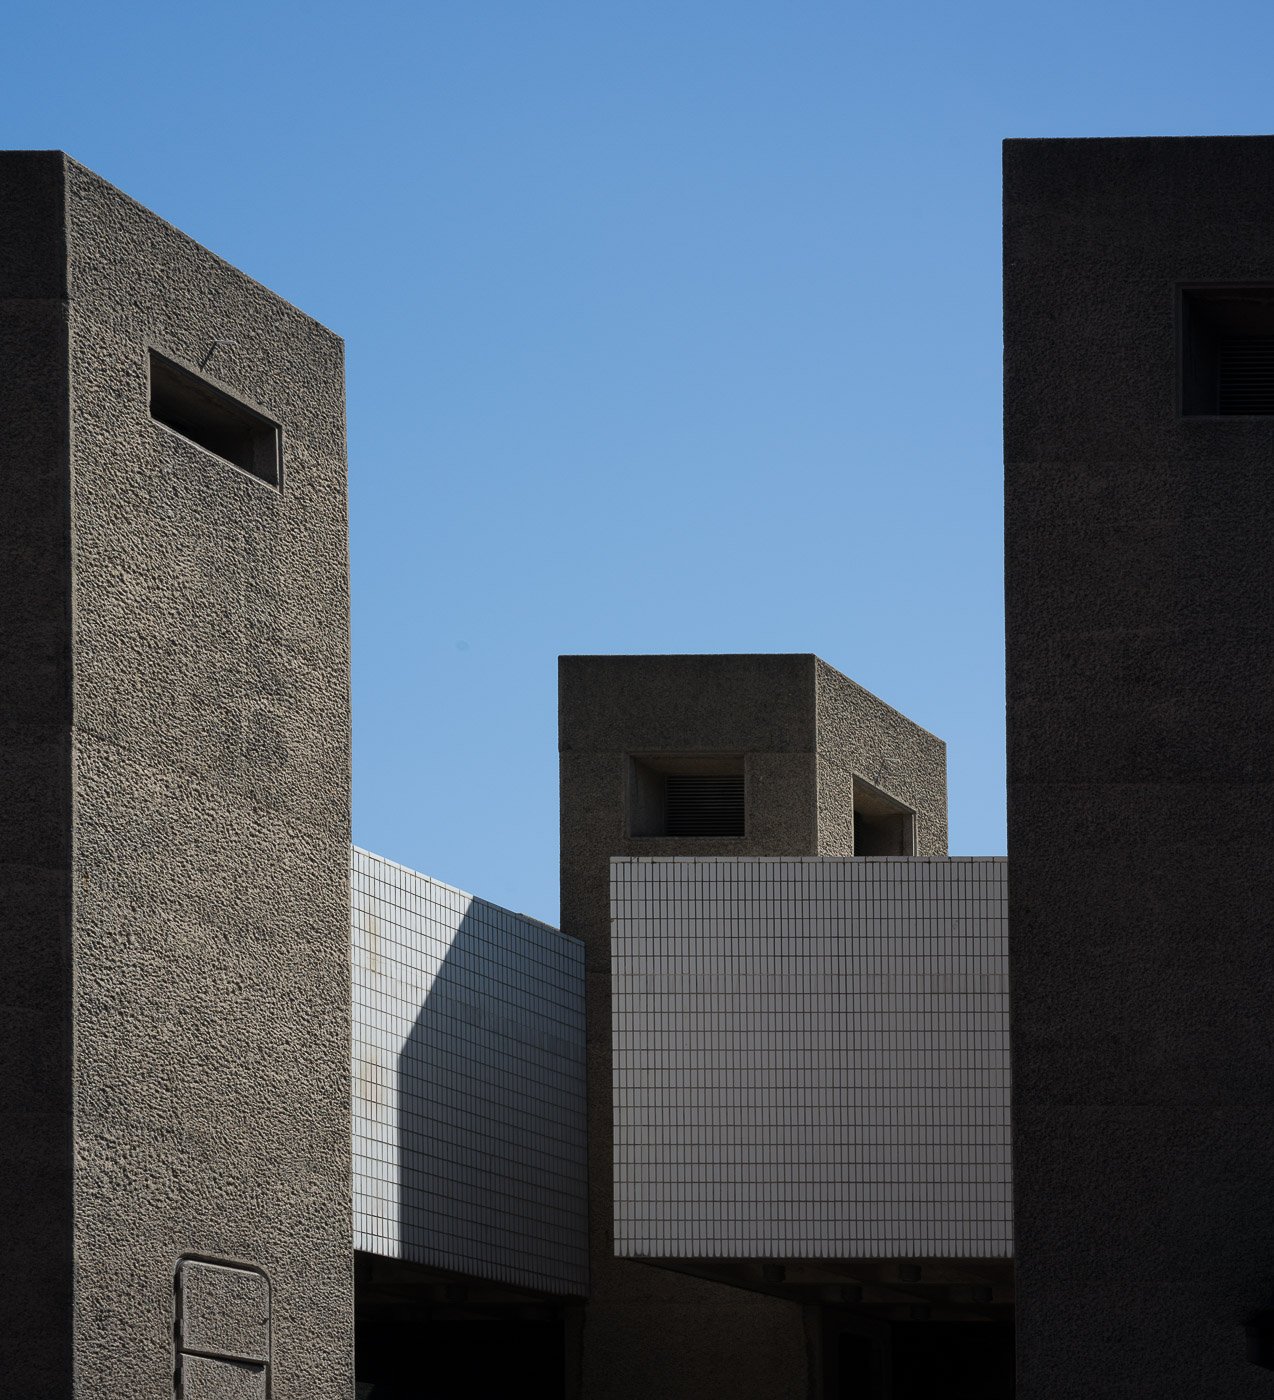
If I could send someone to only one London location to learn architectural composition, the Barbican would be close to the top of the list. It gives you repeated balconies, deep overhangs, walkways, rough concrete, water, planted areas and large shifts in scale without needing to move very far.
What to practise: simplification. Rather than trying to explain the whole estate, choose one plane, one rhythm or one relationship between light and form. Then move a few metres and make a completely different photograph. It is an excellent place to understand that one location should never mean one image.
Light: overcast conditions can be excellent because they reveal concrete texture and keep tonal contrast manageable. Low directional sunlight creates a much more graphic result, with shadows cutting across the structure. Neither is inherently better.
Lens choice: a short telephoto is especially useful for isolating details and compressing repeated elements. A wider lens works when the surrounding space matters to the design.
Access note: the Barbican currently publishes specific small-scale photography guidance for the open public spaces of the Centre, while the wider residential estate is handled separately. Check the latest Barbican photography guidance, and remember that parts of the estate are people’s homes.
South Bank and Bankside: architecture with space around it
The river changes the way you photograph architecture. Around the South Bank and Bankside you have long sightlines, open sky, reflections, bridges, brick, concrete and enough distance to make the relationship between a building and its surroundings part of the picture.
The National Theatre and the riverside around Tate Modern are useful not because they are famous, but because they offer different kinds of structure within a relatively compact area.
What to practise: leading lines, negative space and the balance between a strong architectural mass and a relatively empty sky or river. Bridges and riverside walkways can also be used as geometric elements rather than simply as subjects.
Light: late afternoon, golden hour and blue hour all offer different possibilities. If there is moving cloud or water, this is also one of the best parts of London for long exposure photography.
Canary Wharf: glass, steel and controlled repetition
Canary Wharf is much more visually uniform than most of central London, which is useful when you want to concentrate on precision. Towers, bridges, docks, polished surfaces and the lines of the Docklands Light Railway create repeated opportunities for symmetry, reflection and compression.
What to practise: make both the obvious wide view and the photograph you discover afterwards. Start with the building as an object, then move closer and ask whether the same façade can become an abstract arrangement of line, colour or reflection.
Light: blue hour works well because illuminated interiors begin to separate from the remaining colour in the sky. Bright sun can be equally useful for strong reflections and hard-edged shadows.
Access: much of the estate is privately managed. If you are bringing a tripod, working with a group or planning anything beyond discreet personal photography, check the current site rules first rather than assuming that a public-looking space is public land.

Residential modernism: slower and often more rewarding
Some of London’s most interesting architecture was designed as housing rather than as a landmark. The Brunswick Centre, Trellick Tower and Alexandra Road Estate all reward a slower approach and are useful places to study repetition, human scale and the relationship between architecture and everyday life.
What to practise: patience. Work the same structure from several distances. Ask what happens when you include a person, remove them, compress the building with a longer lens or deliberately allow surrounding life into the frame.
Etiquette: these are homes. Stay on public routes, avoid photographing directly into windows or private balconies, and do not let the search for a picture override the fact that people live there.
My three-pass approach to a London location
When a location feels visually overwhelming, I often reduce it to three passes. It is a simple method, but it stops you walking away with twenty versions of essentially the same photograph.
- Establish the structure. Make the wider frame that explains the building, its setting or the relationship between major forms.
- Look for relationships. Move closer or change position and concentrate on two or three elements interacting: an edge against a tower, a reflection, a shadow, a repeated balcony, a person against a large plane.
- Remove context. Use a longer focal length or a tighter crop until the architecture becomes line, colour, rhythm or abstraction.
Those three photographs may have been made within fifty metres of each other, but they should feel as though they solve three different visual problems.
Practical rules that matter almost everywhere
Watch your verticals. If you want parallel verticals, keep the camera level and allow enough room to correct perspective later. If you deliberately want convergence, make it look intentional rather than accidental.
Check the frame edges. Architectural photographs often fail at the margins: a clipped balcony, a lamp post entering from nowhere, half a window or a bright distraction in a corner.
Do not wait for “perfect” weather. Grey London light can be excellent for texture, colour and restrained tonal work. Bright sun is better for shadow and graphic contrast. Rain gives reflections. The useful question is not whether the weather is good, but what kind of photograph it supports.
Move before changing lenses. A different focal length changes the perspective only if you also change your position. Often the more important decision is where you stand.
Give yourself time. A location usually becomes more interesting after the obvious frame has been made. Stay long enough to notice the less immediate picture.
Respect access and people. Security staff, residents and venue rules are part of working in a city. Be polite, keep equipment compact where possible and move on if a location is not available.
Private photography tuition in London
We can work with your camera and experience level, concentrating on the decisions you need to make while photographing real London buildings. Sessions are individually planned rather than fixed group walks.
One final thought
London is useful precisely because it refuses to give you one consistent architectural language. The most productive way to photograph it is not to collect buildings, but to use those buildings to practise seeing: simplifying when a scene is too dense, adding layers when it is too empty, changing distance, waiting for light and asking whether the first photograph is really the best one available.